I’m happy to say that my collaboration with Robbe from n3rdware has finally reached the finish line. Robbe has been designing and selling custom GPU coolers for years, with most of his customers coming from the home lab community, so this project was in very capable hands from the start. Our goal was to build a custom aftermarket cooler for the NVIDIA L4, and while the result is not perfect and could still be improved in several ways, it is more than good enough for my use case. For me, the biggest win is the noise reduction. I simply cannot hear the GPU anymore.
The problem
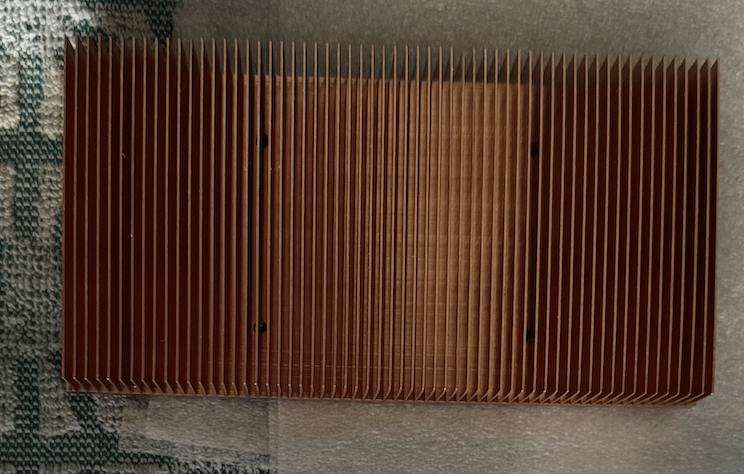
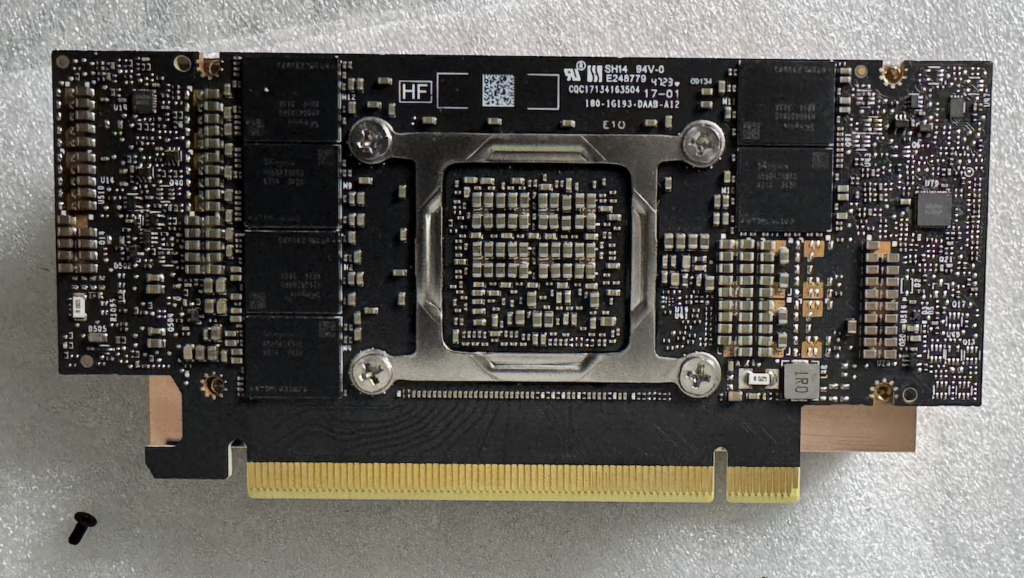
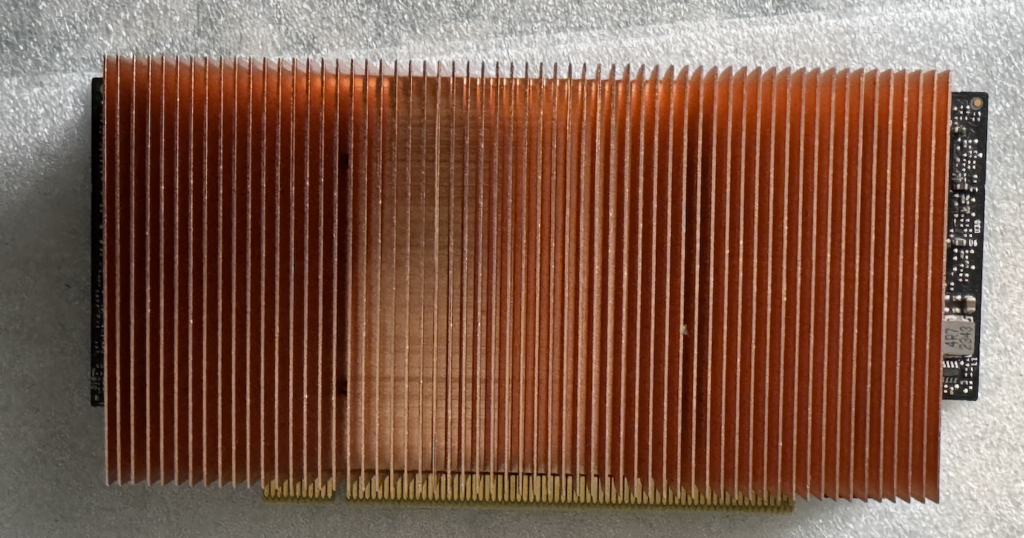
The NVIDIA L4 ships as a single-slot, passively cooled data center card. It’s designed for servers with high-airflow chassis and carefully engineered front-to-back cooling. But if you’re running an L4 in a workstation-class ESXi host where airflow isn’t as aggressive, that passive heatsink just doesn’t cut it. The card runs hot, the server fans ramp up to compensate, and you’re left with a loud, thermally constrained system.
My first attempt: the DIY route
Before partnering with n3rdware, I tried solving the problem myself. I picked up a blower fan with a 3D-printed mounting bracket off eBay (these kits typically go for around 20 to 30 dollars) to direct airflow over the L4’s heatsink. On the control side, I used a Noctua fan speed controller to manually adjust RPM depending on the workload and time of year.
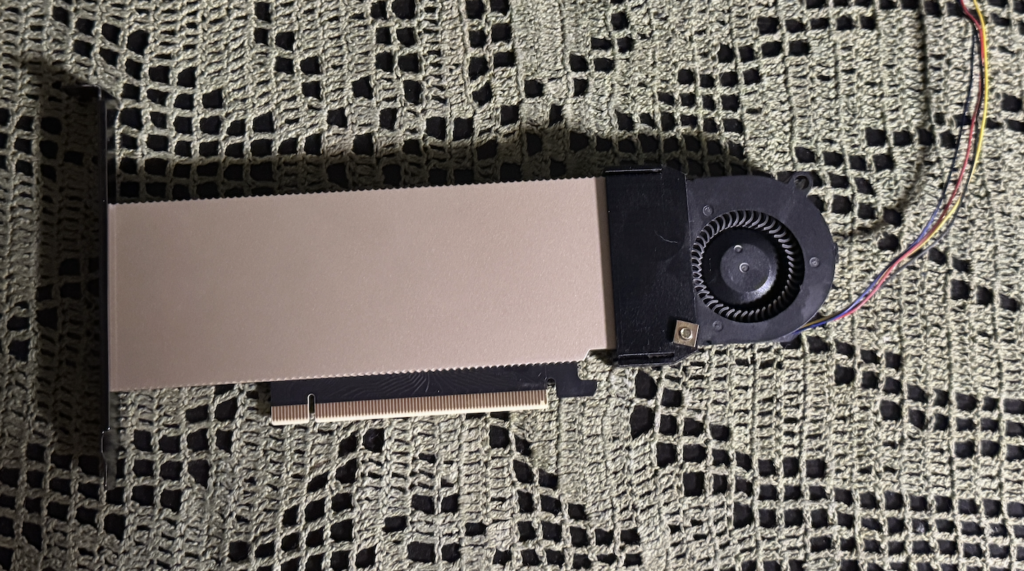
To be fair, this setup did work. The blower fan was able to keep the GPU cool enough to avoid shutdowns. But it came with trade-offs. The noise was still very noticeable, especially during summer when higher fan speeds were needed to compensate for the warmer ambient air. And manually adjusting fan speed with a physical knob isn’t exactly elegant. The solution simply didn’t meet my standards. I prefer to run everything at the lowest temperatures possible, and I wanted something quieter and more hands-off. That’s what led me to reach out to Robbe and kick off this project.
NB! My ESX-1 host sits inside a high-airflow PC case, which helps with overall chassis cooling. If you’re running a similar setup in a different enclosure, your temperatures may vary depending on your case’s airflow characteristics and ambient room temperature.
Installing the cooler: a tight fit
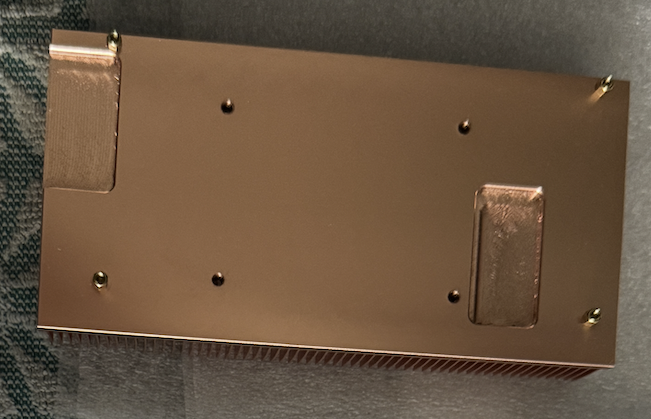
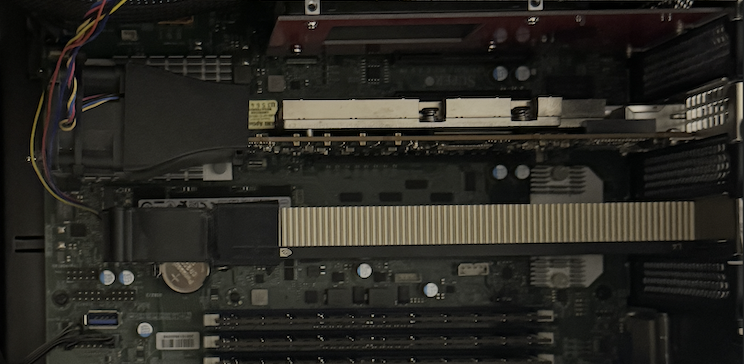
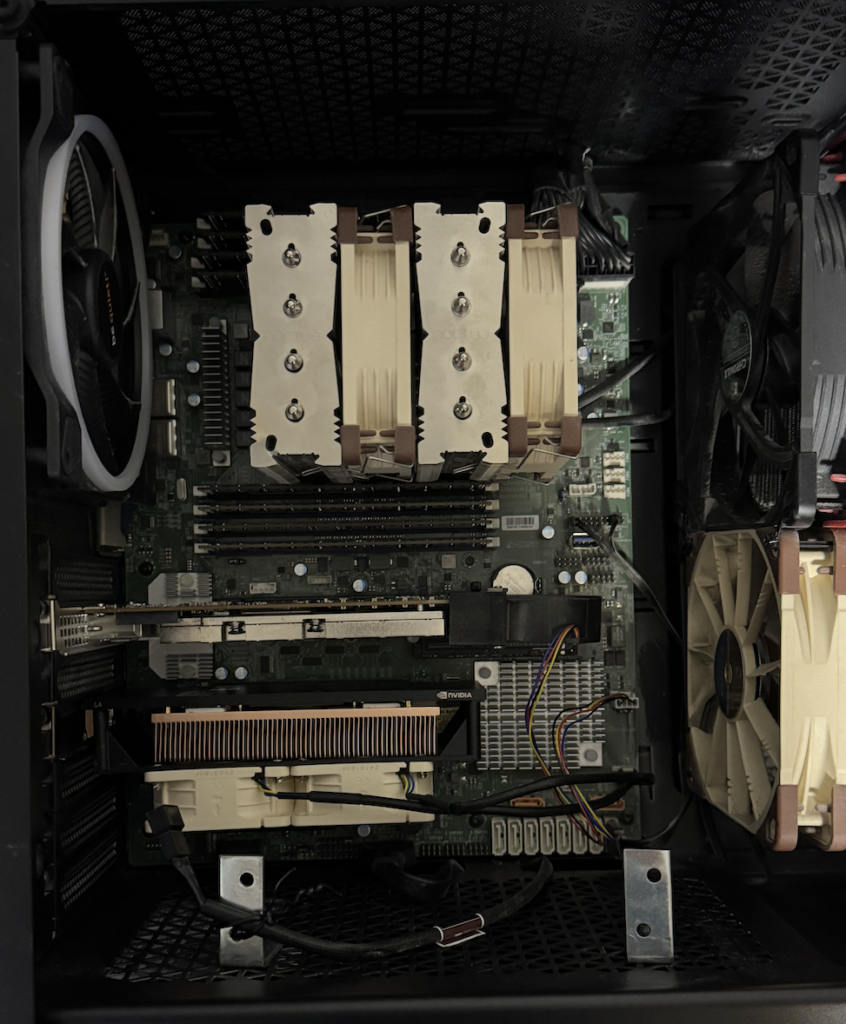
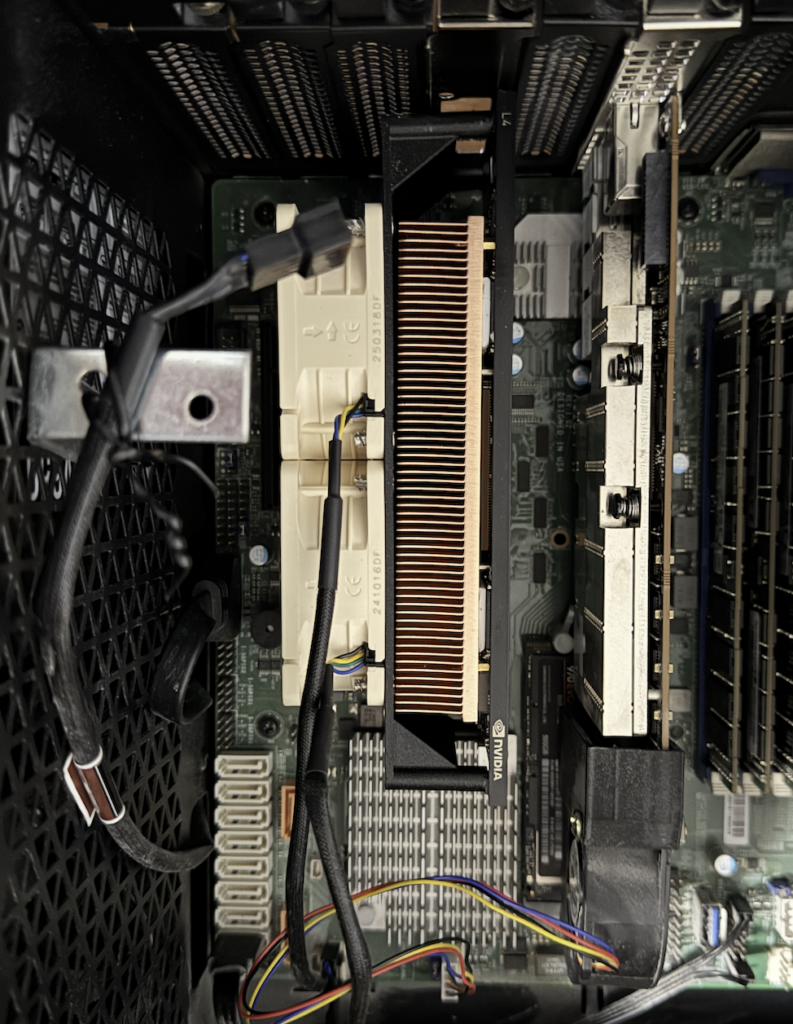
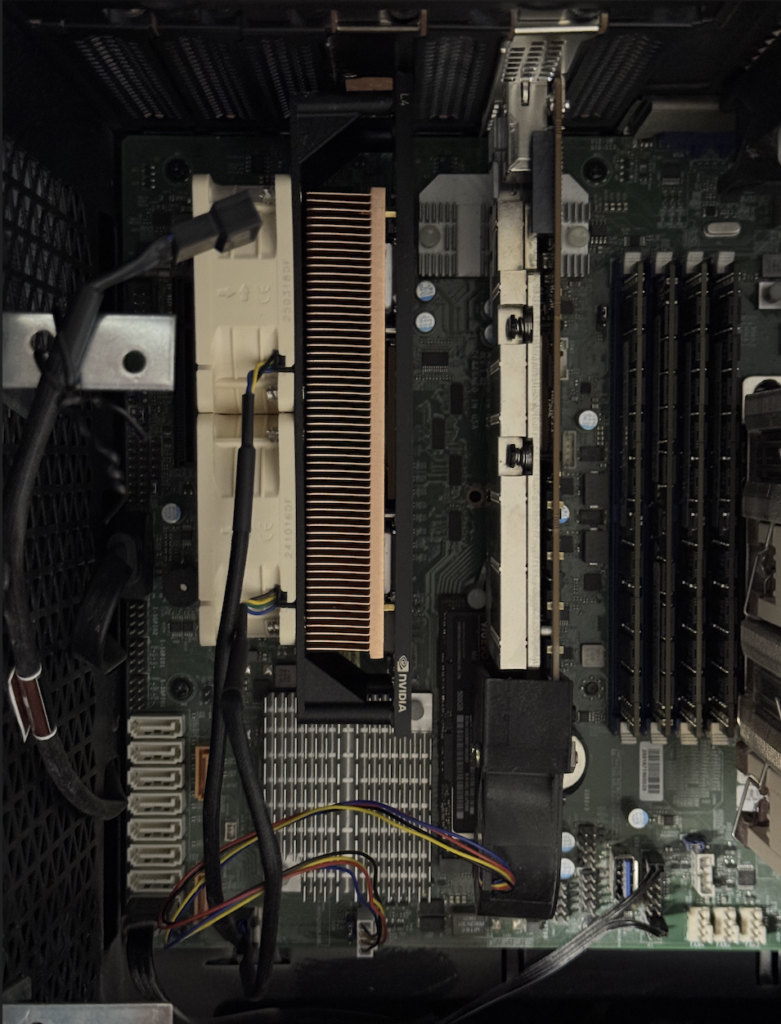
The new cooler occupies three PCIe slots, and fitting it into the ESX-1 chassis was a very close call. Transistors and heatsinks on the motherboard nearly blocked the cooler from seating properly. I had to swap my 100 Gig NIC with the GPU because the motherboard heatsink was blocking the space in the original slot. The cooler also occupied adjacent PCIe slots on the board, further limiting layout options.
According to Robbe from n3rdware, the cooler is actually designed to be used with a riser cable, which would avoid these physical clearance issues entirely. In my case I went with a direct seat, which worked, but it required some creative slot rearrangement to make everything fit.
Test setup
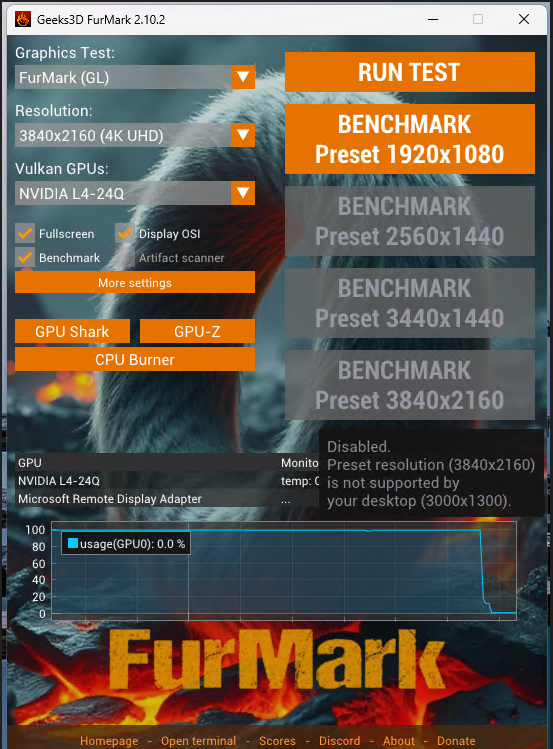
For the stress test, I ran Geeks3D FurMark 2.10.2 inside a Windows virtual machine on the ESX-1 host. The VM was configured with a vGPU profile L4-24Q, giving it the full 24 GB of the L4’s VRAM. The hypervisor is VMware vSphere 8 Update 3. FurMark was set to the FurMark (GL) graphics test at 3840×2160 (4K UHD) resolution with the Fullscreen, Display OSI, and Benchmark options enabled.
Telemetry was captured at 1-second intervals via nvidia-smi on the ESXi host, recording GPU temperature, power draw, clock speeds, utilization, and power state throughout each run.
nvidia-smi --query-gpu=timestamp,name,temperature.gpu,power.draw,clocks.gr,clocks.mem,utilization.gpu,pstate --format=csv -l 1 > /tmp/ESX_1_L4_cooling-test_final.csv
nvidia-smi dmon -s pcut -d 1
nvidia-smi -l 1
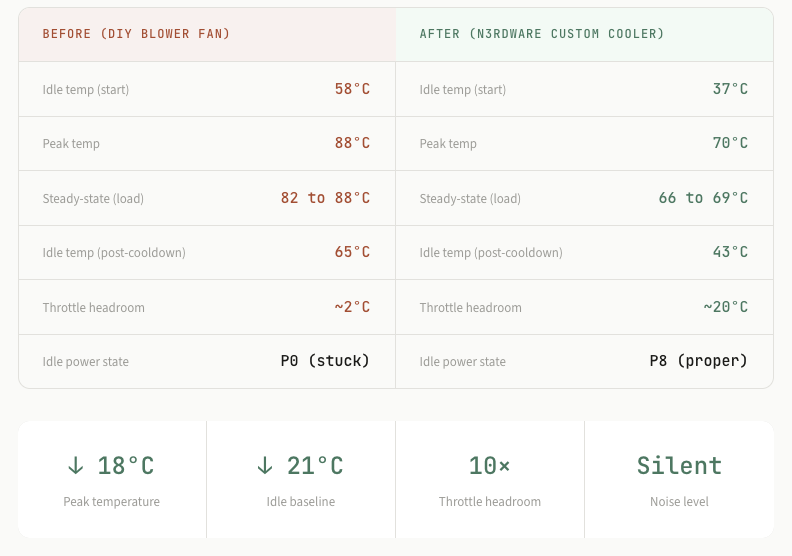
The numbers at a glance
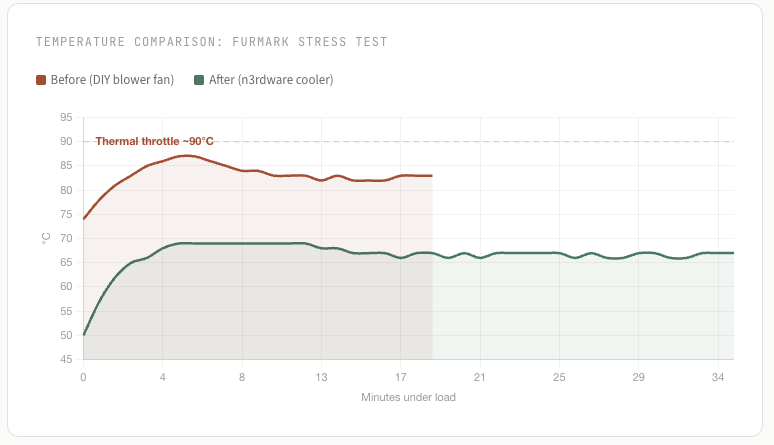
Temperature under load: the headline chart
The most dramatic difference is visible in the temperature curves during sustained 99% GPU utilization under FurMark. With the stock cooler, temperature climbed relentlessly toward the thermal ceiling. With the n3rdware cooler, it plateaus comfortably in the upper 60s.
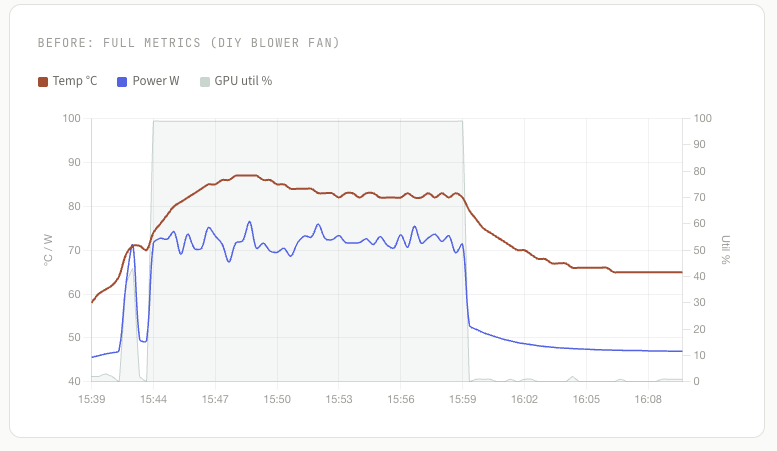
Full telemetry: before (DIY blower fan)
The DIY blower fan test tells a concerning story. Starting at 58°C idle (already elevated), the GPU hits 88°C within about 8 minutes of FurMark at full blast, dangerously close to the ~90°C thermal throttle threshold. Temperature does plateau as the GPU throttles clocks to limit heat output, but this means you’re trading cooling headroom for performance loss.
Warning sign: The GPU never entered P8 idle state during the “before” test. It sat at P0 even at rest, drawing 45 W at idle instead of the expected ~18 W. This suggests the DIY cooling solution’s thermal performance was not sufficient for the GPU to enter its low-power state.
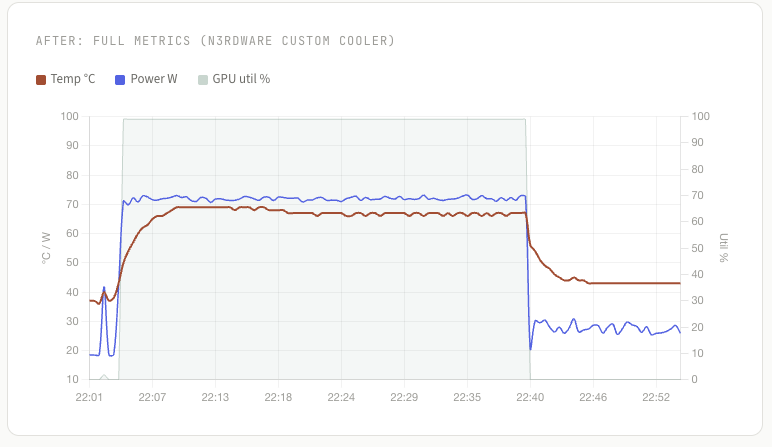
Full telemetry: after (n3rdware cooler)
The n3rdware cooler data paints a completely different picture. The GPU starts at a cool 37°C in P8 power state (18 W). Under the same FurMark stress load, sustained for over twice as long (35 minutes vs. 16), the temperature tops out at just 70°C and holds steady at 66 to 69°C for the duration. Power draw remains consistent at ~72 W with no thermal-induced fluctuations.
Key result: The n3rdware cooler maintains the GPU 20°C below the thermal throttle threshold even under prolonged sustained load. There’s enough headroom for higher ambient temperatures, adjacent hot components, or even a more demanding workload.
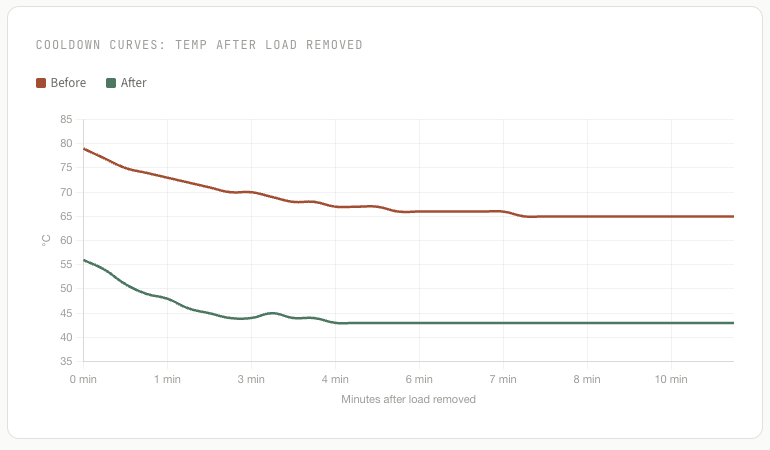
Cooldown recovery
Thermal recovery tells you about heat dissipation capacity. After the FurMark load was removed, the DIY blower fan took the GPU from 82°C down to 65°C in about 10 minutes. It never reached its original 58°C baseline, suggesting heat was accumulating in the chassis faster than airflow could extract it.
The n3rdware cooler dropped the GPU from 67°C to 43°C in roughly 14 minutes, landing just 6°C above the cold-start baseline. The smooth, steep decay curve indicates the cooling system has ample capacity and isn’t heat-saturated.
What about power efficiency?
An often overlooked benefit of better cooling: the GPU ran at a lower idle power. With the DIY blower fan leaving the GPU stuck in P0 at rest, idle power was ~46 W. The n3rdware cooler allows the GPU to properly enter P8, dropping idle draw to ~18 W, resulting in a 60% reduction in idle power consumption. Over time, in a multi-GPU rack, those watts add up.
Under load, both tests show similar power draw (~71 to 73 W avg), confirming the workload was identical. The difference is entirely in thermal management.
The unsung hero: noise
Numbers on a chart are great, but the single biggest quality-of-life improvement from this project is one you can’t graph: noise. With the DIY blower fan, I was constantly managing RPM through the Noctua fan controller. During cooler months it was tolerable, but in summer the fan had to run at higher speeds to keep up, and the noise became a real annoyance.
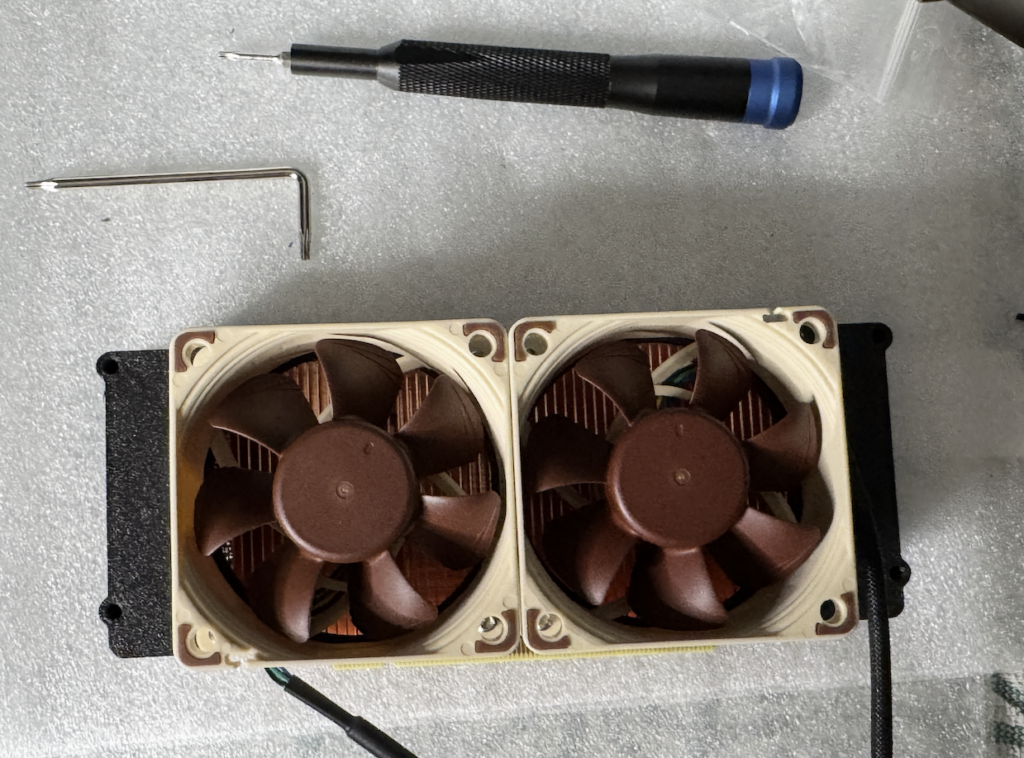
With the n3rdware cooler actively managing heat on its own, the chassis fans can stay at a much lower RPM and there’s no manual speed controller to fiddle with. The difference is night and day. I simply cannot hear the GPU anymore. For a homelab or office environment, this alone makes the upgrade worth it.
The verdict
Going from a budget DIY blower fan to the n3rdware custom cooler transformed this NVIDIA L4 from a thermally constrained, manually managed card into a properly cooled accelerator with massive headroom. Peak temperature dropped from 88°C to 70°C, idle temperature fell from 58°C to 37°C, and the GPU now properly enters low-power states at rest.
Is it a perfect cooler? No. The 3-slot form factor is tight in many chassis, and you may need a riser cable for a clean install. But the results speak for themselves: 18°C cooler under sustained load, 60% less idle power draw, no more manual fan control, and most importantly, a quiet system I can actually work next to.
Big thanks to Robbe at n3rdware for the collaboration. For anyone running L4s in ESXi environments, especially in dense rack configurations or noise-sensitive spaces, this kind of aftermarket cooling solution is well worth exploring.
NVIDIA L4 Cooling Results with a Custom 1 Slot Cooler from n3rdware
n3rdware NVIDIA L4 Coolers: 3-Slot vs 1-Slot Compared
NVIDIA A2: Cooling a Lower-Power GPU with a DIY Blower Fan