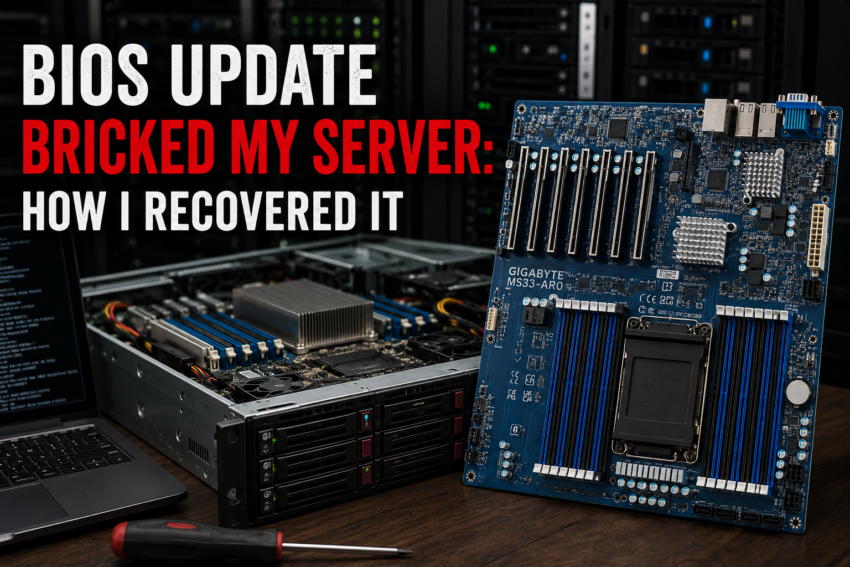
I recently managed to brick my server motherboard by updating it to the latest BIOS version. The BIOS update itself completed successfully, but after rebooting, the server would no longer POST properly. It was getting stuck during initialization and never reached the operating system.
The motherboard is a Gigabyte MS33-AR0. Everything worked before the BIOS update. After installing the newer BIOS, it didn’t. Fortunately, this is a server motherboard, and server hardware gives you several recovery options that you normally do not have on a desktop PC.
I ended up testing different BIOS versions, BMC firmware, BIOS recovery, BIOS swap, CMOS resets, minimal hardware configurations and several different flashing methods. Eventually, I recovered the server by going back to an older working BIOS and then moving upward through the BIOS versions.
This is what I did, what worked, what didn’t work and the recovery process I would use if it happened again.
First, Understand BIOS and BMC
There are two important pieces of firmware involved here: the BIOS and the BMC.
The BIOS is responsible for starting the actual server. It initializes the CPU, memory, chipset, PCIe devices and other hardware before handing control over to the operating system.
The BMC, or Baseboard Management Controller, is basically a small independent computer built into the server motherboard. It has its own processor, memory, firmware and network interface. You can access it remotely over the network, normally through its IP address using a web browser, and on some systems also through SSH if SSH access is enabled in the BMC.
The BMC keeps working even when the main server is shut down. As long as the server is connected to power and the PSU is switched on, the BMC normally remains available. From the BMC you can power the server on, shut it down, restart it, open a remote KVM console, mount ISO files and install an operating system remotely.
This is one of the biggest advantages of proper server hardware. The operating system does not need to work, and in many cases the main BIOS does not need to work either. The server itself can be completely shut down. It only needs to be connected to power with the PSU switched on so that the BMC receives standby power.
How You Can Access the BMC
The easiest way is through the BMC web interface. The BMC has its own IP address. You enter that IP address into a browser and log in.
From there you can normally access hardware monitoring, logs, firmware information, power controls, KVM and firmware updates.
Another option is SSH. SSH needs to be enabled in the BMC first. It gives you command line access to the BMC operating system and can be useful for advanced troubleshooting and firmware recovery.
There are also management interfaces such as IPMI and Redfish that can be used for remote management and automation.
For BIOS recovery, the BMC web interface is normally the easiest place to start. SSH becomes more interesting when the normal web based firmware update mechanism cannot do what you need.
Different Ways to Install a Server BIOS
There are several ways to install a BIOS on a server motherboard.
BMC Web Interface
This is the method I prefer when the motherboard supports it. The main server can be shut down while the BMC remains online.
On my Gigabyte MS33-AR0, the BIOS package contains an RBU folder with an image.RBU file. This is the file used for BIOS updates through the BMC.
The process is straightforward:
- Shut down the server.
- Leave the power cables connected.
- Leave the PSU switched on.
- Log in to the BMC web interface.
- Open the firmware update section.
- Select BIOS as the firmware type.
- Select the correct BIOS update file.
- On my Gigabyte board, this is
RBU/image.RBU. - Start the firmware update.
- Do not remove power while the update is running.
- Wait until the BMC reports that the update has completed.
- Power on the server and check whether it completes POST.
BIOS or UEFI Interface
If the server can still reach BIOS setup, the motherboard may provide a built in firmware update function.
- Download the correct BIOS package for the exact motherboard model.
- Extract the firmware package.
- Copy the required files to a USB drive if necessary.
- Boot the server.
- Enter BIOS or UEFI setup.
- Open the firmware update utility.
- Select the BIOS image.
- Start the update.
- Do not interrupt the power.
- Reboot when instructed.
UEFI Shell
Another option is flashing from a UEFI shell. Server BIOS packages can include EFI flashing utilities and scripts. The Gigabyte BIOS packages I was working with contained AfuEfix64.efi together with Gigabyte supplied scripts.
- Download the correct BIOS package.
- Extract it.
- Copy the required files to a FAT32 USB drive.
- Boot into the UEFI shell.
- Find the USB filesystem.
- Navigate to the BIOS update directory.
- Run the vendor supplied update script.
- Wait for the update to complete.
- Follow the manufacturer’s shutdown or restart instructions.
I would use the flashing utility and scripts supplied with the actual BIOS package rather than downloading a random version of AFU and experimenting with commands.
Windows or Linux
Some manufacturers also provide Windows or Linux BIOS update utilities. These are useful during normal maintenance, but they do not help much when the server cannot boot an operating system.
For a server motherboard, I prefer using the BMC whenever possible.
BIOS Recovery Options
1. Clear CMOS
The first thing I would try is clearing CMOS. This removes the existing BIOS configuration from the equation.
- Shut down the server.
- Disconnect the AC power cables.
- Switch the PSU off.
- Wait until the BMC shuts down completely.
- Check the motherboard manual for the CMOS clear jumper.
- Move the jumper into the CMOS clear position.
- Leave it there for the time specified by the manufacturer.
- Return the jumper to its normal position.
- If necessary, remove the CMOS battery as well.
- Press the server power button several times while AC power is disconnected.
- Leave the battery out for several minutes.
- Reinstall the battery.
- Make sure the CMOS jumper is back in its normal position.
- Reconnect AC power.
- Switch the PSU on.
- Wait for the BMC to start.
- Power on the server.
- Check whether the server completes POST.
In my case, clearing CMOS did not fix the problem.
2. Reduce the Server to Minimum Hardware
The next step is removing everything that is not required for POST. This helps determine whether the problem is actually BIOS related or caused by another component.
- Shut down the server.
- Disconnect AC power.
- Switch the PSU off.
- Remove all GPUs.
- Remove NVMe drives.
- Remove SATA drives if possible.
- Remove additional PCIe cards.
- Remove unnecessary USB devices.
- Remove the TPM module if it is removable and not required for the test.
- Remove all but one memory module.
- Check the motherboard manual for the correct slot for a single DIMM.
- Install one known good memory module in that slot.
- Leave only the motherboard, CPU, one DIMM and required power connections.
- Reconnect AC power.
- Switch the PSU on.
- Wait for the BMC to start.
- Open KVM.
- Power on the server.
- Watch the POST process.
- Check the BMC POST history.
On the MS33-AR0, I used A0 for the single DIMM test.
The goal here is not to boot Windows or Linux. You only want to know whether the motherboard can initialize the CPU, memory and chipset.
3. Check the Full POST History
Do not rely only on what you see on the KVM screen.
In my case, KVM showed:
Chipset Initialize...
with POST code EE.
It looked like the motherboard had stopped at EE. When I checked the POST history, however, I could see that the system had continued through additional POST codes.
This meant the KVM screen was not showing the actual final point of the failure.
To check this:
- Log in to the BMC.
- Find the POST code or diagnostic section.
- Export the POST history if your BMC supports it.
- Start the server.
- Let it run until it stops or resets.
- Check the complete POST sequence.
- Look for repeating sequences.
- Check whether the machine resets and starts POST again.
- Record the final POST code.
- Compare it with previous attempts or a successful boot if you have one.
Be careful with generic POST code lists found online. Do not assume a generic AMI POST code definition is automatically correct for your exact motherboard and firmware.
4. Reflash the Same BIOS Through the BMC
If the BMC still works, try flashing the same BIOS again before moving to another version.
- Shut down the server.
- Leave AC power connected.
- Leave the PSU switched on.
- Log in to the BMC.
- Open the firmware update section.
- Select BIOS update.
- Select the correct vendor supplied BIOS file.
- Start the update.
- Do not restart the server or remove power.
- Wait until the BMC reports that the update has completed.
- Power on the server.
- Check whether it completes POST.
In my case, reflashing the newer BIOS completed successfully, but the server still did not boot.
This is an important distinction. A successful firmware flash does not necessarily mean that the BIOS version can successfully initialize your hardware.
5. Try an Older BIOS
This eventually became the important part of my recovery.
If the server worked before a BIOS update, find the last known working BIOS version.
- Find the BIOS version that was installed before the problem started.
- Download it from the manufacturer if it is still available.
- If it is no longer publicly available, contact the manufacturer and ask for it.
- Make sure you have the correct update package for your exact motherboard.
- Shut down the server.
- Leave AC power connected and the PSU switched on.
- Log in to the BMC.
- Open the BIOS firmware update section.
- Upload the older BIOS image.
- Start the update.
- Wait until the BMC reports that the flash has completed.
- Power on the server.
- Check whether it completes POST.
- If it works, record that version.
- Move upward through the BIOS versions one version at a time and test after each update.
This is what became particularly interesting in my case.
I initially tried R15 and R15 did not work.
Instead of stopping there, I went further back and installed R09. The server POSTed successfully with R09. I then started moving upward through the older BIOS versions and testing them.
My results eventually looked like this:
| BIOS | Result |
|---|---|
| R09 | Works |
| R10 | Works |
| R15 first attempt | Fails |
| R15 after moving up from older BIOS | Works |
| R21 | Fails |
| R23 | Fails |
So R15 was not simply a BIOS version that worked from the beginning. On my first attempt it failed. I needed to go back to R09, get the server booting again and then move upward through the BIOS versions. When I installed R15 again after doing that, it worked.
That is how I eventually got the server running on R15.
This is also why I would not randomly jump between BIOS versions. If the latest BIOS breaks the server, find an older version that definitely works and move forward from there.
6. Update the BMC
Gigabyte support also provided me with a newer BMC firmware and recommended updating it before continuing with the BIOS testing.
My original BMC version was:
13.06.27
Gigabyte provided:
13.06.29
The update process was:
- Download the correct BMC firmware for the exact motherboard.
- Shut down the host server.
- Keep AC power connected.
- Keep the PSU switched on.
- Log in to the BMC web interface.
- Open the BMC firmware update section.
- Select the correct BMC firmware image.
- In the package Gigabyte supplied to me, the web update image was
rom_v130629.ima_enc. - Start the update.
- Do not remove power.
- Wait for the BMC to restart.
- Reconnect to the BMC web interface.
- Confirm that the new BMC version is installed.
- Test the BIOS again.
After updating my BMC to 13.06.29, I tested the latest BIOS again. It still failed in the same way.
That gave me useful information. The BMC was now updated to the version Gigabyte wanted me to use, but the latest BIOS still did not work with my configuration.
7. Use the BIOS Recovery Jumper
Many server motherboards have a dedicated BIOS recovery mechanism. On the MS33-AR0 it is called BIOS_RCVR.
The exact procedure depends on the motherboard, so check the manual first.
The general process is:
- Download the correct BIOS recovery package.
- Prepare a USB drive in the format required by the manufacturer.
- Copy the required recovery BIOS file to the USB drive.
- Shut down the server.
- Disconnect AC power.
- Locate the
BIOS_RCVRjumper. - Take a photo or record its original position.
- Move the jumper into the recovery position.
- Connect the USB drive.
- Reconnect AC power.
- Switch the PSU on.
- Power on the server.
- Watch the local display or KVM.
- Wait for the BIOS recovery environment to start.
- Follow the recovery instructions.
- When recovery is complete, shut down the server.
- Disconnect AC power.
- Return the
BIOS_RCVRjumper to its normal position. - Remove the USB drive.
- Reconnect power.
- Test normal boot.
In my case, the motherboard recognized that recovery mode was enabled and displayed:
Please wait into BIOS recovery
But it never actually entered the BIOS recovery environment.
So this method did not recover my server.
8. Try BIOS Swap
My motherboard also has a BIOS_SWAP jumper.
Some server motherboards have redundant BIOS functionality or multiple firmware regions. If your motherboard provides a documented BIOS swap function, it can provide another recovery option.
- Shut down the server.
- Disconnect AC power.
- Switch the PSU off.
- Locate the BIOS swap jumper.
- Take a photo of its original position.
- Change it to the alternate position.
- Reconnect AC power.
- Switch the PSU on.
- Wait for the BMC to start.
- Power on the server.
- Check whether the machine starts POST.
- If it does not work, shut the server down again.
- Disconnect AC power.
- Return the jumper to its original position.
BIOS swap did not recover my server either.
Do not start randomly moving service jumpers. Server motherboards can have BIOS recovery, BIOS swap, ME recovery, ME update and CMOS clear jumpers very close together. Know exactly what you are changing before touching them.
9. Recover Through the UEFI Shell
If the server can still reach a UEFI shell, you have another recovery option.
The Gigabyte BIOS packages I was working with contained an EFI firmware utility called AfuEfix64.efi together with Gigabyte supplied flashing scripts.
The general process is:
- Download the correct BIOS package.
- Extract the package.
- Copy the required update files to a FAT32 USB drive.
- Connect the USB drive to the server.
- Boot into the UEFI shell.
- Identify the USB filesystem, for example
fs0:. - Change to that filesystem.
- Navigate to the BIOS update directory.
- Confirm that the vendor supplied EFI flashing utility is present.
- Confirm that the vendor supplied update script is present.
- Run the vendor supplied script.
- Wait for the flash to complete.
- Follow any shutdown instructions included with the BIOS package.
- Remove the USB drive.
- Test the server.
I would not create my own AFU commands unless I knew exactly which firmware regions they were going to modify.
10. Recover Through BMC SSH
If the BMC web interface cannot perform the recovery you need, SSH may provide another route.
This is a more advanced recovery method and depends on the BMC implementation. Do not assume that commands from another server motherboard will work on yours.
First, SSH must be enabled on the BMC.
- Log in to the BMC web interface.
- Check whether SSH access is available.
- Enable SSH if required.
- Find the BMC IP address.
- From another computer, connect to the BMC:
ssh username@BMC_IP- Log in using the BMC credentials.
- Look for BIOS related firmware utilities.
For example:
find / -name "*bios*" -type f -executable 2>/dev/null- If you find the appropriate utility, inspect its available commands:
/path/to/tool --help- Determine which firmware file format the utility expects.
- Confirm that the utility and procedure are intended for your motherboard and BMC firmware.
- Transfer the correct vendor supplied firmware image to the BMC if required.
- Run the vendor documented flashing command.
- Wait until the process completes.
- Power cycle the host if required.
- Check whether the server completes POST.
I would not use undocumented force, skip signature or similar options simply because a firmware image is being rejected.
A rejected firmware file can be the wrong format, an image for a different platform or a raw firmware dump rather than the signed update package expected by the BMC.
11. A Raw BIOS Backup Is Not the Same as a BIOS Update Package
Before the problem happened, I had created a full BIOS dump through the BMC.
My backup was a complete 64 MiB SPI image.
That backup was useful, but the BMC would not accept it as a normal BIOS update. The BMC expected the correct signed update package.
If you have a raw BIOS dump:
- Keep the original file unchanged.
- Make several copies.
- Calculate a SHA256 hash.
- Store the hash together with the backup.
- Do not modify your only copy.
- Do not assume renaming the file turns it into a normal BIOS update package.
- Keep the image in case direct SPI recovery becomes necessary later.
A raw SPI backup and a normal BMC BIOS update package serve different purposes.
12. Contact the Motherboard Manufacturer
This was one of the most useful steps in my recovery.
I contacted Gigabyte and explained exactly what had happened. They supplied a newer BMC firmware and several older BIOS versions that I could test.
When contacting the manufacturer, provide useful technical information instead of simply saying that the server does not boot.
Send them:
- Exact motherboard model.
- Current BIOS version.
- Previously working BIOS version.
- Current BMC version.
- POST behavior.
- Last POST code if known.
- Whether BMC is accessible.
- Whether KVM works.
- Whether BIOS flashing through BMC still works.
- Which BIOS versions you have already tested.
- Whether CMOS reset was tested.
- Whether minimum hardware configuration was tested.
- Whether BIOS recovery mode worked.
If you need an older BIOS, specifically ask for the older BIOS versions in the correct BMC flashable format.
In my case, getting the official older firmware from Gigabyte was much more useful than trying to force an unsupported firmware image into the motherboard.
13. External SPI Programming
If the BMC cannot recover the BIOS, the recovery jumper does not work, BIOS swap does not work, UEFI cannot start and there are no other vendor recovery methods available, the last option may be programming the physical BIOS flash chip directly.
This requires an external SPI programmer suitable for the flash chip on the motherboard.
The process should be approached carefully:
- Shut down the server.
- Disconnect all AC power.
- Locate the BIOS flash chip.
- Read the exact chip markings.
- Find the chip datasheet.
- Confirm its operating voltage.
- Determine whether the motherboard uses one or multiple firmware flash chips.
- Select a programmer that supports the chip.
- Connect the programmer correctly.
- Read the existing flash.
- Save the dump.
- Read it again.
- Save the second dump.
- Read it a third time.
- Calculate hashes of all three dumps.
- Confirm that all three reads are identical.
- Make multiple backups of the original firmware.
- Prepare the known good firmware image.
- Write the image to the flash.
- Read the flash again after writing.
- Verify that the written data matches the intended image.
- Disconnect the programmer.
- Return the motherboard to its normal configuration.
- Clear CMOS.
- Reconnect power.
- Test POST.
If repeated reads from the chip do not produce identical files, stop. Do not write anything until the reading problem has been solved.
External SPI programming would be my last recovery method, not the first one.
My BIOS Recovery Troubleshooting Order
If another server stopped booting immediately after a BIOS update, I would now troubleshoot it in this order:
- Check whether the BMC is still accessible.
- Record the BIOS and BMC versions.
- Check KVM and the complete POST history.
- Try reflashing the same BIOS through the BMC.
- Clear CMOS completely.
- Reduce the server to the minimum hardware configuration.
- Find the last known working BIOS and install it.
- If it works, move upward through BIOS versions and test them one at a time.
- Update the BMC if the manufacturer recommends it.
- Try the motherboard’s BIOS recovery mode.
- Try documented BIOS swap functionality if available.
- Use the vendor supplied UEFI flashing utility if the server can reach UEFI.
- Investigate BMC SSH recovery if the platform provides the required firmware utilities.
- Contact the motherboard manufacturer and request the required older BIOS packages.
- Use an external SPI programmer only when the normal recovery methods are exhausted.
How I Finally Recovered My Server
In my case, the BMC was the key to recovering the motherboard. The main server could not complete POST, but the BMC remained fully operational. I could access it remotely, use KVM, read POST history, control the server’s power and continue flashing BIOS firmware even while the host itself was shut down.
Gigabyte provided me with BMC version 13.06.29 and several older BIOS releases. I updated the BMC and tested the latest BIOS again, but the server still did not boot.
I then started testing the older BIOS versions. My first attempt with R15 did not work. I went further back to R09, and the server finally completed POST again. From there, I started moving upward through the older BIOS versions and testing them instead of jumping directly back to the latest release.
R09 worked. R10 worked. When I reached R15 again, R15 now worked as well. R21 and R23 did not work with my configuration.
That was how I recovered the server. I did not simply downgrade directly to R15 and get a working machine. I first had to go back to R09, establish a known working BIOS and then move upward until I reached R15.
The biggest practical lesson for me is what I will do before the next BIOS update. I will keep a copy of the currently working BIOS package, record the current BIOS and BMC versions, download any older firmware I may need and make a full BIOS backup if the BMC supports it.
If a new BIOS turns a working server into a machine that cannot POST, having the previous firmware already available makes the recovery much easier.